Ore-Ida Tater Tots Cooking Instructions: A Comprehensive Guide
This guide delivers detailed instructions for preparing Ore-Ida Tater Tots using various methods, ensuring perfectly crispy and golden results every time.
From traditional oven baking to convenient air frying and even grilling, discover the optimal techniques for enjoying this beloved potato snack.
Understanding Ore-Ida Tater Tots
Ore-Ida Tater Tots are a quintessential American comfort food, celebrated for their unique shape and satisfyingly crispy texture. These bite-sized potato cylinders aren’t just a snack; they’re a versatile side dish enjoyed by all ages. Understanding their composition is key to achieving optimal cooking results. They are created from grated potatoes which are then seasoned and formed into their signature cylindrical shape.
The success of Tater Tots lies in their ability to become delightfully golden brown and crispy on the outside while remaining fluffy on the inside. Different cooking methods – oven baking, air frying, deep frying, or even grilling – each yield slightly different textures, catering to individual preferences. Mastering these methods unlocks the full potential of this classic potato product, ensuring a consistently delicious experience.
What are Tater Tots?

Tater Tots are essentially small, cylindrical portions of grated potato, seasoned and deep-fried or baked until golden and crispy. Originating as a clever way to utilize leftover potato scraps from French fry production, they quickly gained popularity as a standalone snack and versatile side dish. The name “Tater Tot” is a registered trademark of Ore-Ida, the company largely credited with their widespread adoption.
Their unique shape maximizes surface area, contributing to their exceptional crispiness. Tater Tots are incredibly adaptable, pairing well with a wide range of dips and entrees. They are a staple in school cafeterias, restaurants, and home kitchens across the United States, representing a beloved and convenient culinary option for many.
The History of Tater Tots
The story of Tater Tots begins in the 1950s with the Ore-Ida company, founded by F. Nephi Grigg. Faced with excess potato peelings from their French fry manufacturing process, Grigg’s sons, Golden and Gary, ingeniously devised a solution: repurpose the potato scraps into a new product. They experimented with mashing, seasoning, and extruding the potato remnants into small cylinders.
Initially marketed to grocery stores in 1953, Tater Tots didn’t immediately take off. However, a strategic partnership with schools proved pivotal. Their affordability and ease of preparation made them a hit in school lunch programs, rapidly boosting their popularity. By the 1980s, Tater Tots had become a cultural icon, firmly establishing themselves as a beloved American snack food.
Traditional Oven Cooking Methods
Oven baking remains a classic way to prepare Ore-Ida Tater Tots, delivering consistent results with minimal effort and readily available equipment.
Preheating the Oven
Achieving the perfect crispness with Ore-Ida Tater Tots begins with proper oven preheating. Setting the oven to the correct temperature ensures even cooking and optimal texture. According to instructions, preheat your oven to 425°F (218°C) before arranging the tots on a baking sheet.
Allow sufficient time for the oven to reach the desired temperature – typically around 10-15 minutes. Using an oven thermometer is recommended to verify accuracy, as oven temperatures can vary. A fully preheated oven guarantees that the tots will cook uniformly, resulting in a golden-brown exterior and a fluffy interior. Don’t skip this crucial step for the best possible outcome!
Arranging the Tater Tots
Proper arrangement of Ore-Ida Tater Tots on the baking sheet is key to ensuring even cooking and maximum crispiness. Avoid overcrowding; spread the frozen tots in a single layer, leaving a little space between each one. This allows hot air to circulate effectively, promoting uniform browning and preventing them from steaming instead of baking.
An 11×17 inch baking sheet is recommended for optimal results. If necessary, use two baking sheets to prevent overcrowding. Avoid piling the tots on top of each other, as this will lead to uneven cooking and potentially soggy tots. A single layer guarantees each tot gets adequately exposed to the oven’s heat.
Baking Time and Temperature (425°F)
For consistently golden and crispy Ore-Ida Tater Tots, preheat your oven to 425°F (218°C). Once preheated, place the arranged Tater Tots into the oven. The recommended baking time is typically between 20 to 24 minutes, but this can vary slightly depending on your oven and desired level of crispness.
Begin checking for doneness around the 20-minute mark. The tots are ready when they are golden brown and crispy on the outside. Rotating the baking sheet halfway through the cooking process can help ensure even browning. Monitor closely during the final few minutes to prevent burning, adjusting the time as needed.
Checking for Doneness
Determining when Ore-Ida Tater Tots are perfectly cooked involves assessing both color and texture. Visually, the tots should exhibit a rich, golden-brown hue, indicating sufficient heat exposure. A key indicator of doneness is crispness; the exterior should feel firm to the touch, not soft or soggy.
Carefully remove a few tots from the oven or air fryer and allow them to cool slightly before tasting. A properly cooked Tater Tot will be crispy on the outside and fluffy on the inside. If they aren’t crispy enough, continue cooking for a few more minutes, checking frequently to avoid overcooking.

Air Fryer Cooking Instructions
Achieve incredibly crispy Tater Tots quickly and easily using an air fryer! This method delivers fantastic results with minimal oil, offering a healthier option.
Air Fryer Temperature (400°F)
Setting your air fryer to 400°F (204°C) is crucial for achieving perfectly cooked Ore-Ida Tater Tots. This temperature ensures rapid heating and promotes even browning, resulting in a delightfully crispy exterior and a fluffy interior. Lower temperatures may lead to soggy tots, while higher temperatures could cause burning before the inside is fully heated.
Preheating your air fryer to 400°F for a few minutes is also recommended for optimal results. This ensures the tots are immediately exposed to the hot air, initiating the cooking process quickly. Consistent temperature is key, so avoid opening the air fryer frequently during cooking, as this can disrupt the heat circulation and affect the final texture. Remember to always consult your air fryer’s manual for specific instructions and safety guidelines.
Air Fryer Cooking Time (12 Minutes)
A cooking time of 12 minutes at 400°F generally yields perfectly crispy Ore-Ida Tater Tots in an air fryer. However, this can slightly vary depending on your specific air fryer model and the quantity of tots being cooked. It’s best to start with 12 minutes and check for doneness, adding a few extra minutes if needed.
For a consistently golden and crunchy result, avoid overcrowding the air fryer basket. Working in batches ensures proper air circulation around each tot. After the initial 6 minutes, gently shake or toss the tots to promote even cooking; This prevents sticking and ensures all sides are exposed to the hot air. Monitor closely during the last few minutes to prevent burning, and adjust cooking time accordingly.
Tossing for Even Cooking
Tossing the Ore-Ida Tater Tots midway through the air frying process is crucial for achieving optimal crispiness and preventing uneven cooking. This simple step ensures that all sides of each tot are exposed to the circulating hot air, resulting in a uniformly golden-brown exterior.
After approximately 6 minutes of cooking, carefully open the air fryer basket and gently shake or toss the tots using a spatula or tongs. Avoid overcrowding the basket, as this can hinder proper air circulation. Tossing breaks up any potential sticking and promotes even browning. Continue cooking for the remaining time, monitoring closely to prevent burning, and enjoy perfectly cooked tater tots!

Alternative Cooking Methods
Beyond oven baking and air frying, Tater Tots can be deliciously prepared through deep frying for extra crispiness or grilled for a smoky flavor.
Deep Frying Tater Tots
Deep frying Ore-Ida Tater Tots results in an exceptionally crispy exterior and fluffy interior, offering a truly indulgent experience. Begin by heating approximately 2-3 inches of oil – peanut, canola, or vegetable oil work well – in a deep fryer or large, heavy-bottomed pot to 350°F (175°C).
Carefully add a single layer of frozen Tater Tots to the hot oil, avoiding overcrowding to maintain consistent temperature. Fry for 2-3 minutes, or until golden brown and crispy. Remove the Tater Tots with a slotted spoon and place them on a wire rack lined with paper towels to drain excess oil.
Season immediately with your favorite spices, such as salt, pepper, garlic powder, or paprika, while they are still hot. Caution: Deep frying involves hot oil and requires careful attention to safety precautions.
Cooking Tater Tots on a Grill
Grilling Ore-Ida Tater Tots imparts a unique smoky flavor, adding a delightful twist to this classic snack. Preheat your grill to medium heat, around 350-400°F (175-200°C). For best results, use a grill basket or aluminum foil with poked holes to prevent the tots from falling through the grates.
Spread the frozen Tater Tots in a single layer within the basket or foil. Grill for 10-15 minutes, flipping occasionally to ensure even cooking and browning. Monitor closely to prevent burning. The Tater Tots are ready when they are golden brown and crispy on all sides.
Remove from the grill and season immediately with your preferred spices. Enjoy this flavorful and convenient way to prepare your favorite potato treat!
Tips for Perfect Tater Tots
Achieve ultimate crispiness by avoiding overcrowding and ensuring even heat distribution during cooking. Season immediately post-cooking for maximum flavor impact!
Achieving Maximum Crispiness
To unlock the full potential of Ore-Ida Tater Tots and achieve that coveted, irresistible crispiness, several key techniques are essential. Firstly, avoid overcrowding the baking sheet or air fryer basket. A single layer allows for optimal air circulation, ensuring each tot browns evenly.
Secondly, consider lightly tossing the tots with a small amount of oil – just a teaspoon or two – before cooking. This promotes even browning and enhances the crispy texture.
Finally, don’t be afraid to increase the cooking time slightly, monitoring closely to prevent burning. A golden-brown color and a satisfying crunch are the hallmarks of perfectly crispy Tater Tots. Remember to toss them halfway through for even cooking!
Preventing Sticking
One common challenge when cooking Ore-Ida Tater Tots is preventing them from sticking to the baking sheet or air fryer basket. To combat this, preparation is key. Lightly greasing the cooking surface with cooking spray or a thin layer of oil creates a non-stick barrier.
Alternatively, using parchment paper or a silicone baking mat provides an excellent, reusable solution. Ensure the tots aren’t piled on top of each other, as this increases the likelihood of sticking.
For air fryers, a perforated parchment liner designed for air frying works wonders. Regularly checking and gently flipping the tots during cooking can also help prevent adhesion and promote even cooking.
Seasoning Options
While Ore-Ida Tater Tots are delicious on their own, enhancing their flavor with seasonings is a popular practice. Simple options include a sprinkle of salt, pepper, garlic powder, or paprika immediately after cooking, while the tots are still hot.
For bolder flavors, consider tossing them with Cajun seasoning, chili powder, or even a blend of Italian herbs. A drizzle of melted cheese and a dash of hot sauce can transform them into loaded tots.
Experimenting with different spice rubs before cooking can also infuse the tots with flavor from the inside out. Don’t be afraid to get creative and personalize your tots!

Nutritional Information
Understanding the nutritional content of Ore-Ida Tater Tots is crucial for balanced eating. Serving size and specific product variations impact calorie and nutrient levels.
Ore-Ida Tater Tots Nutritional Facts
Understanding the nutritional profile of Ore-Ida Tater Tots allows for informed dietary choices. A typical serving size, approximately 3 ounces (85g), contains around 160 calories. This includes roughly 9 grams of fat, with 1.5 grams being saturated fat.
Sodium content is notably around 180 milligrams per serving. Carbohydrates contribute about 18 grams, with 2 grams coming from dietary fiber. Protein content is relatively low, at approximately 2 grams per serving.
Tater Tots also provide a small amount of essential vitamins and minerals, including iron and potassium. However, they are primarily a source of carbohydrates and fats. It’s important to consider these facts when incorporating them into a balanced diet, and to be mindful of portion sizes.
Serving Size Considerations
Controlling portion sizes is crucial when enjoying Ore-Ida Tater Tots, given their caloric density and fat content. A standard serving, as indicated on the packaging, is approximately 3 ounces (85 grams) or about 10-12 tots. Consuming larger portions can significantly increase calorie and fat intake.
Consider pairing Tater Tots with a balanced meal that includes lean protein and plenty of vegetables to mitigate their nutritional impact.
For individuals monitoring their sodium intake, being mindful of serving size is particularly important. Adjusting portion sizes based on individual dietary needs and activity levels is recommended for maintaining a healthy lifestyle. Enjoying them as an occasional treat, rather than a staple, supports balanced eating habits.

Safety Precautions
Always exercise caution when handling hot Tater Tots and operating kitchen appliances. Prioritize oven and air fryer safety to prevent burns and accidents.
Handling Hot Tater Tots
Caution is paramount when dealing with freshly cooked Ore-Ida Tater Tots, as they reach extremely high temperatures during the cooking process. Always utilize oven mitts or heat-resistant gloves when removing the baking sheet or air fryer basket from the oven or appliance.
Avoid direct contact with the hot Tater Tots immediately after cooking; allow them to cool slightly on a wire rack before serving. When transferring Tater Tots to a serving dish, use a slotted spoon or spatula to prevent burns.
Supervise children closely when Tater Tots are being served, ensuring they understand the potential for burns. Remind everyone to test the temperature before consuming, and be mindful of steam released when transferring them from the cooking vessel.
Oven Safety
Prioritize safety when utilizing your oven for cooking Ore-Ida Tater Tots. Always ensure the oven is stable and positioned on a level surface; Never leave a preheating or operating oven unattended, especially around children or pets.
Use oven mitts or pot holders when handling hot baking sheets or adjusting oven racks. Avoid placing anything flammable near the oven, and be cautious of hot surfaces. Ensure proper ventilation during cooking to prevent the buildup of fumes.
Regularly inspect the oven for any damage, such as cracked doors or faulty heating elements. If issues arise, discontinue use and consult a qualified technician. Always turn off and unplug the oven after use.
Air Fryer Safety
Prioritize safety when using an air fryer to cook Ore-Ida Tater Tots. Always position the air fryer on a stable, heat-resistant surface, away from flammable materials. Never submerge the air fryer housing in water or any other liquid.

Exercise extreme caution when handling the hot basket and cooked Tater Tots. Utilize oven mitts or tongs to prevent burns; Avoid overfilling the basket, as this can lead to uneven cooking and potential hazards;
Regularly inspect the air fryer for any damage to the cord or heating elements. If issues arise, discontinue use and consult the manufacturer. Always unplug the air fryer when not in use and allow it to cool completely before cleaning.

Ore Reserves and Mineral Resources (Australia)
Australia boasts significant mineral resources, with Western Australia holding the majority of iron ore. The ASX lists numerous companies involved in resource extraction.
Australian Identified Mineral Resources
Australia’s Identified Mineral Resources (AIMR) encompass a diverse range of 36 commodities, providing a comprehensive assessment of the nation’s mineral wealth. Of these, estimates for Ore Reserves are available for 31 commodities, indicating areas ready for economic extraction. Notably, 27 commodities were actually included in Australia’s Estimated Ore Reserves as of recent assessments.
Geoscience Australia annually compiles these estimates, offering a crucial overview of the national minerals inventory. This data is vital for investment decisions and sustainable resource management. The AIMR reports detail in-situ resources categorized by geological region, aggregating resources from nearby deposits of similar age or formation. This detailed approach ensures a robust and accurate understanding of Australia’s mineral potential.
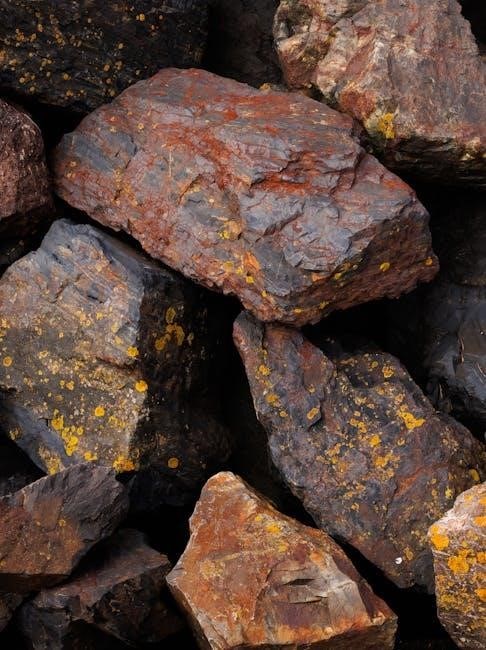
Ore Reserves in Western Australia
Western Australia dominates Australia’s mineral resource landscape, hosting almost 90% of the nation’s identified resources. A significant portion, nearly 80%, is concentrated within the Hamersley region, renowned for its vast iron ore deposits. This makes Western Australia a critical hub for global mineral supply and a key driver of the Australian economy.
The state’s geological formations are exceptionally favorable for mineralisation, attracting substantial investment in exploration and mining activities. Detailed assessments of Ore Reserves within Western Australia are regularly updated, reflecting ongoing discoveries and advancements in extraction technologies. This concentration of resources underscores the state’s importance in the global minerals market.
Estimated Ore Reserves on the ASX
In December 2019, the Australian Securities Exchange (ASX) listed 2,192 companies and securities. A substantial portion, 842 representing 38% of the total, were categorized within the minerals sector. These companies actively report their estimated Ore Reserves as part of their regulatory obligations, providing transparency to investors and stakeholders.
The ASX serves as a crucial platform for companies involved in mineral exploration, development, and production. In situ resources are aggregated by geological region, offering a comprehensive overview of resource distribution. This data is vital for assessing the economic potential of various mining projects and informing investment decisions within the Australian resources industry.